Revit DB Link Extension and ODBC
The DB Link for Revit has been around for quite a while now. First, it existed in Autodesk Labs, and then became a subscription add-in. The 2012 version of DB Link was released simultaneously with Revit 2012 and maybe it’s time to give it try.
The DB Link extension allows you to drop the data from your Revit model into any database that you would be able to connect to by using ODBC, such as an Access mdb, SQL Server, or Oracle database. The more powerful aspect of this extension is that it allows you to bring changes that you make in the database back into Revit.
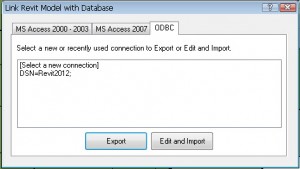
One of the hardest parts of getting the DB Link working (especially if you are on a 64-bit system) is getting the ODBC connection setup. Because of this, most of the information that you’ll find online is in regards to getting the DB Link setup. If you are using a 32-bit version of Revit, then it is fairly straight forward to connect Revit to an Access .mdb file. If you are running a 64-bit version of Revit, try to find out if your company has a SQL Server somewhere that they would consider letting you use. That is much easier than setting it up yourself. Furthermore, you might find someone in your organization who is familiar with ODBC connections. Having someone experienced in databases that you can talk with will make your endeavor into using the DB Link much easier. If this route fails, you can always install SQL Server Express which is very straight forward once it’s installed and you’re connected.
The purpose of this post is actually less on getting the DB Link setup, but more to focus on what you can do with the link once you get it created.
Most relational databases are very similar. The key method of working with them is to use SQL queries on tables. For the most part, these queries are universal when it comes to manipulating the data. Why would you even need to care about querying the database? One reason might be so that you can run your own calculations that combine information in the drawing. That’s what this post is going to explain.
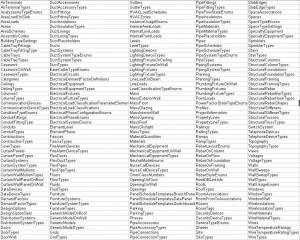
Once you run the export, you will find that there are a lot of tables that it exports. However, it should be easy to clue in on the ones that you are interested in. Once you have found the table that you are interested in you can start to explore the data.

[sourcecode language=”sql”]
SELECT * FROM Windows;
[/sourcecode]
Note that the * represents that you want to select all of the columns.
After you select all the fields from the Windows table, you’ll find that the information is very limited. To obtain more information, such as the size of the window, you’ll have to select from the WindowTypes table and join that information to the Windows table.
[sourcecode language=”sql”]
SELECT * FROM Windows w
INNER JOIN WindowTypes t ON w.TypeId = t.Id;
[/sourcecode]
The ‘w’ following Windows and the ‘t’ following WindowTypes are aliases that save you from having to retype the entire words multiple times. The ON part of the inner join is telling you which columns are being connected together. Note that INNER JOIN is just one type of join. See this webpage for a great explanation on the other types of joins that are possible.
When the select statement is run, it will return a lot of columns. If you wanted to be more specific in the information that you select, instead of using * to select all of the fields, you can specify which ones you are interested in.
[sourcecode language=”sql”]
SELECT w.HeadHeight, w.SillHeight, t.Width, t.Height
FROM Windows w
INNER JOIN WindowTypes t ON w.TypeId = t.Id;
[/sourcecode]
You can slowly start adding on the fields in the beginning of the select clause to add more properties to the Windows.
You can also link multiple joins together, so for example if you wanted information about the walls that the windows were hosted in, we can join on the HostId column.
[sourcecode language=”sql”]
SELECT * FROM Windows w
INNER JOIN WindowTypes t ON w.TypeId = t.Id
INNER JOIN Walls wa ON wa.Id = w.HostId;
[/sourcecode]
The last aspect that I will touch on is that you can perform calculations where we select fields. For example, if you wanted the total area of the wall that ignored the window cutouts, you could use the following query. Be sure to watch out for the units. The query below uses imperial units of feet for everything.
[sourcecode language=”sql”]
SELECT (wa.Area + (t.Width * t.Height)) AS OriginalArea FROM Windows w
INNER JOIN WindowTypes t ON w.TypeId = t.Id
INNER JOIN Walls wa ON wa.Id = w.HostId;
[/sourcecode]
If you have multiple windows on a wall, then you will need to use a GROUP BY clause.
[sourcecode language=”sql”]
SELECT wa.Area + SUM(t.Width * t.Height) FROM Windows w
INNER JOIN WindowTypes t ON w.TypeId = t.Id
INNER JOIN Walls wa ON wa.Id = w.HostId
GROUP BY wa.Id, wa.Area;
[/sourcecode]
In conclusion, you’ll find that having information in a true relational database is very powerful. This is just a start of what you can do with a database and SQL. The next time you need to perform manual calculations on your building, I urge you to consider exporting your Revit project using DB Link, and exploring the possibilities there.


