Revit Render Colors Faded – Mental Ray – Gamma Correction
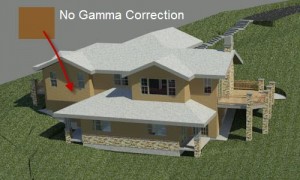
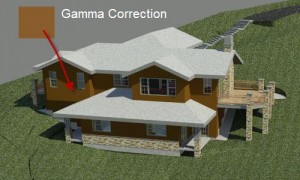
If you have tried rendering in Revit, you may find that the materials have colors that look faded or washed out when rendering. This is because Revit does not apply any gamma correction. While there are settings to apply gamma correction in 3DS Max, this option does not exist in Revit. Fortunately, it is possible to preprocess the material image files manually to account for this.
Gamma Correction
Images are typically encoded with a gamma setting of 2.2, as are the materials in the Autodesk Materials Library. To counteract this, reduce the gamma to the inverse value, approximately 0.45. This can be done with image editing software such as Photoshop.
By default, the images for the material library are installed in the following location:
 64-Bit Windows:
 C:\Program Files (x86)\Common Files\Autodesk Shared\Materials\Textures
 32-Bit Windows:
 C:\Program Files\Common Files\Autodesk Shared\Materials\Textures
GIMP (GNU Image Manipulation Program)
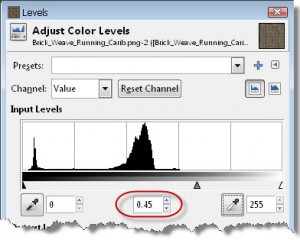
If you do not have any image editing software, try GIMP which is a free Photoshop alternative that easily lets you modify the gamma level of an image file. To adjust the gamma level in GIMP 2.8, on the Colors menu, click Levels. In the Levels window, under Input Levels, set the gamma to 0.45 and click OK.
Applying the Material in Revit
To apply the gamma adjusted material in Revit, in the Ribbon, on the Manage tab click Materials. Select your Material, and click Appearance. For the Image, select your gamma corrected image file. Now when rendering, the appearance of the material will be closer to that of the original.


