IMX File Import for Bridges in Civil 3D 2021
Civil 3D 2021 comes with a powerful new functionality designed to work with bridges created in Infraworks. In previous versions, bridges could be opened or imported as solids in Civil 3D. With 2021, you can import bridges through an IMX file and can identify attributes of the imported bridge. In this article, we will show you a short introduction to importing bridges.
Opening Bridge in InfraWorks
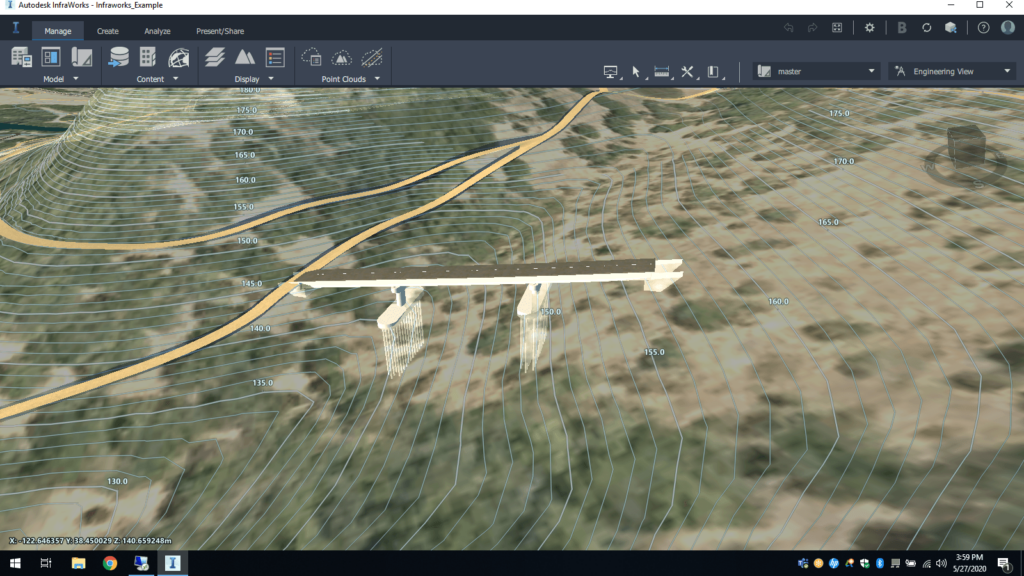
The first step is to open your bridge model in Infraworks. We will not go into creating bridges in this article. In our example, we have a simple bridge created over a small ravine as you can see in Figure 1.
Next, select your bridge system (either the piers or the columns) and right-click the structure. You should see a list of options to click on as shown in Figure 2.
Publishing Civil Structure to Export IMX File
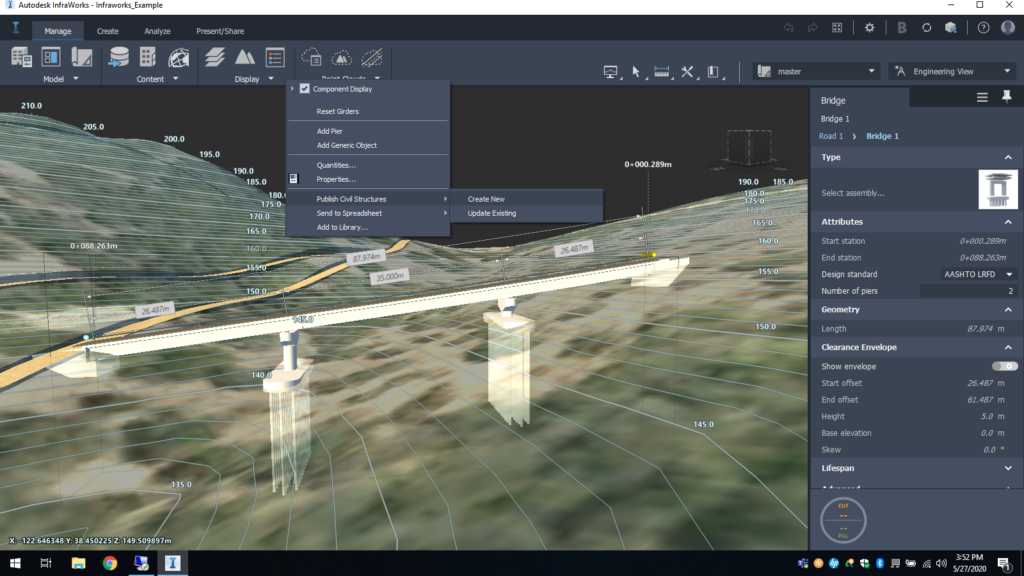
From here, we can select “Publish Civil Structures.” This will export our bridge as an IMX file that we can export into Civil 3D. We have two options to publish; create a new IMX file or, if you had previously published it, update an already existing file.
Troubleshooting Possible Coordinate System Errors
If your InfraWorks model is not using a projected database coordinate system (i.e. NAD83 Zone III, US foot) you will get an error like so in Figure 3.
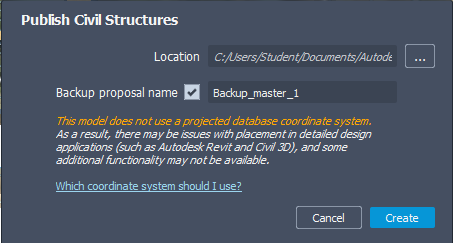
You can select the “Create” button to update the coordinate system to match the one used in your Civil 3D model. In our example, the coordinate systems match in both programs shown in Figure 4 and Figure 5.
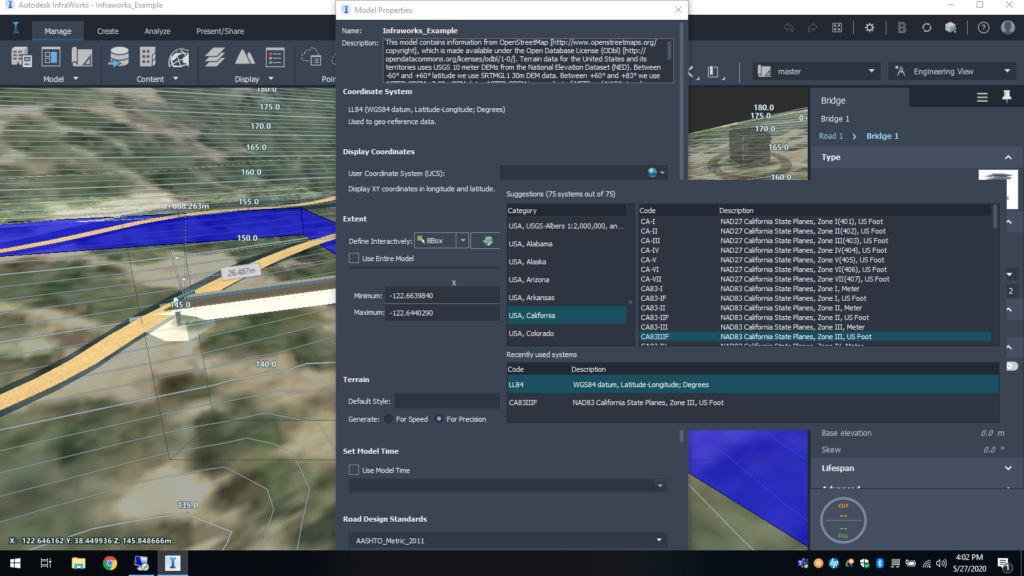
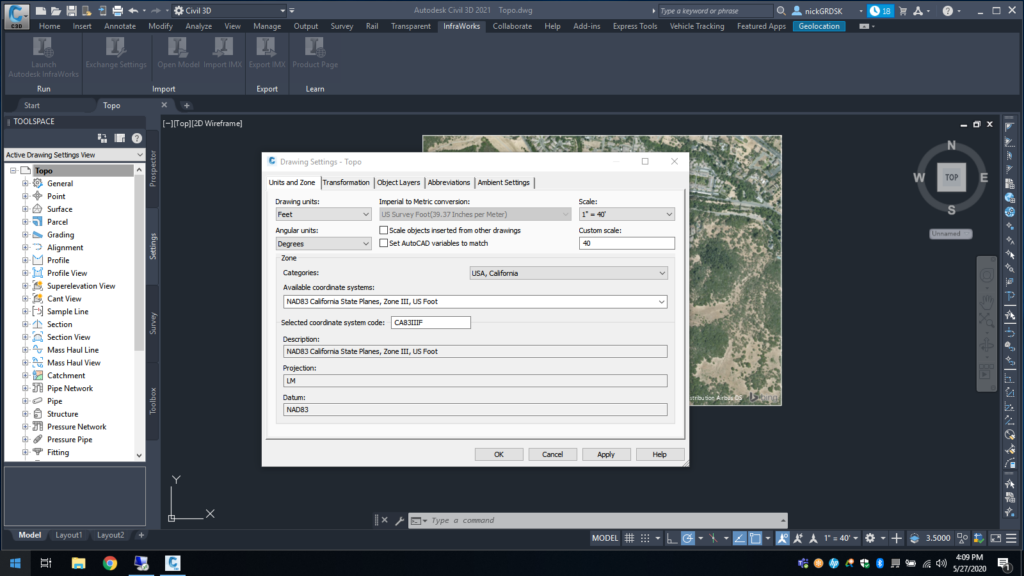
After changing the coordinate system, publish the civil structure again to an IMX file.
Import IMX File into Civil 3D
Now that the IMX file has been created, open your Civil 3D model and import the bridge in. The first thing we are going to check are the import settings for our bridge. You can set them if you go to the Infraworks tab > Import panel > Exchange settings. It should open a window like what is shown in Figure 6.
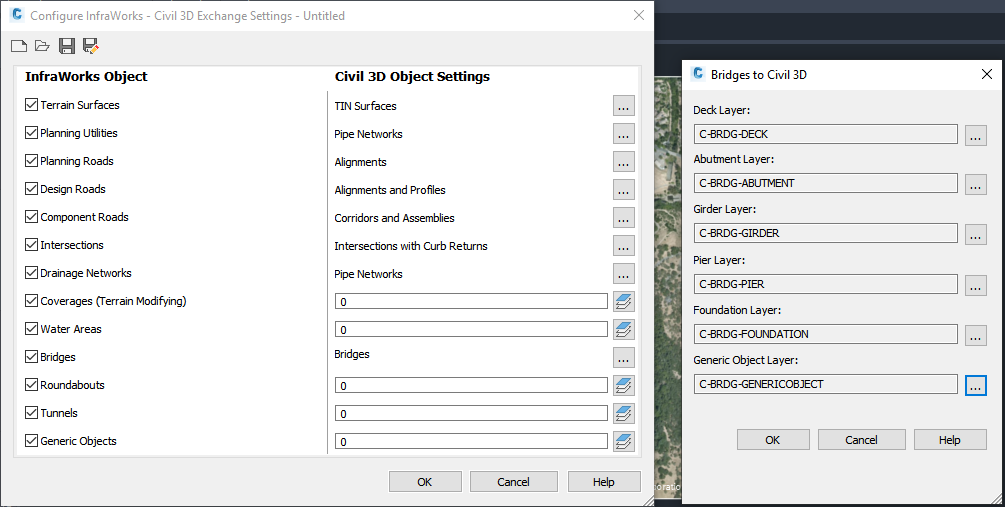
From this window, you will see a section for “Bridges.” Click on the “…” to the right, and you can change the default bridge part layers they will be imported on. For instance, in Figure 6, you’ll notice I changed every bridge part (decks, girders, etc.) to be on their own specific layer.
After establishing our import settings, we are ready to import our bridge. You can do so from the Infraworks tab > Import panel > Import IMX button. Afterwards, select the IMX file we had exported from Infraworks. If everything was done correctly, your bridge model should have come into Civil 3D, as shown in Figure 7.
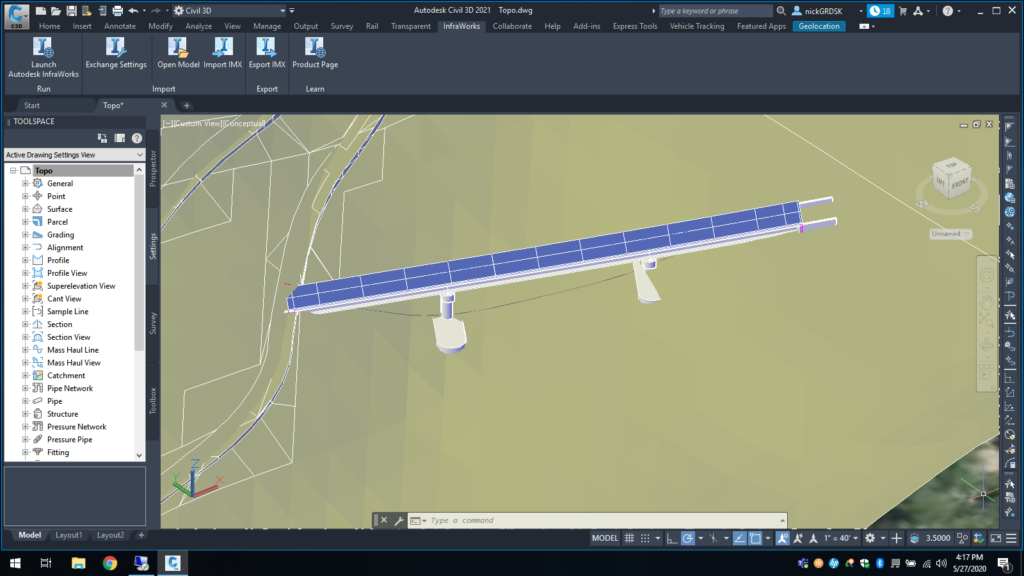
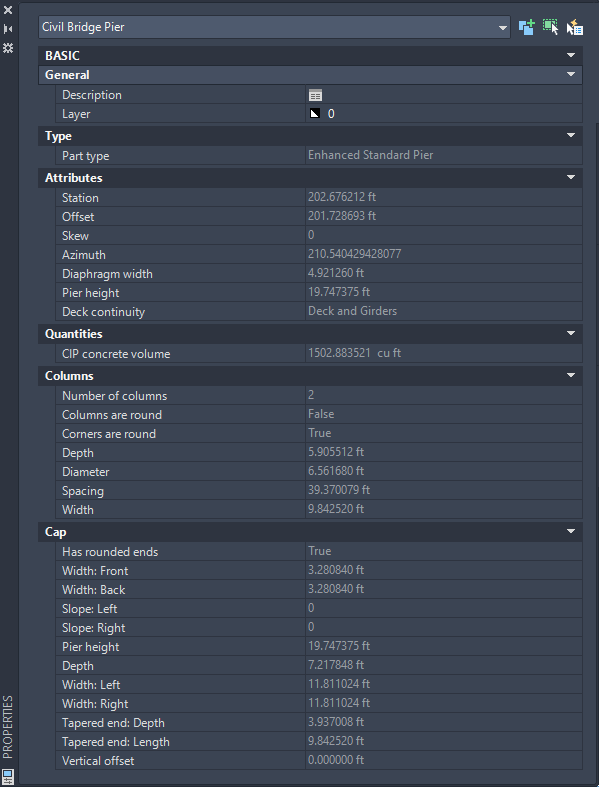
With this imported, you’ll see that all the attributes associated the different bridge components were imported as well, as shown in Figure 8.
Importing bridges has become much more Civil 3D-friendly with the release of 2021 (see our other Civil 3D blogs here). Now, you can view the objects and properties of those objects much more easily & clearly than before. However, you still cannot change or edit bridge properties once imported, as this is primarily an Infraworks function. Autodesk seems to take customer feedback seriously for software updates, and maybe we can see that functionality added in 2022.
If this tutorial helped, CAD Masters also provides Autodesk award-winning training at our Walnut Creek & Sacramento offices, remotely, or at your site. Furthermore, we offer self-paced training through our training books.


