Subscription Series: Pick Your Team
As the excitement fades from Autodesk University and we feel the daze of Christmas and New Year coming on, getting back to work and putting to use what we learned last week may seem difficult. What I got out of AU this year is the need for organizations big and small to work more collaboratively and more efficiently. We must make the most of the resources we have, and that’s people – our employees and co-workers, our clients and communities. So where does Autodesk Subscription fit into all of this “Tis’ the Season” talk? Simple: Access. Subscription offers many extra benefits, of which only a fraction are utilized. We covered logging in, software downloads, on-line training, support, and Home Use perks, but how do we provide this access to our team? It’s actually fairly easy and, well, as the Subscription “Contract Manager,” the last thing you want to do is fulfill requests from users that they can do on their own. I tell Contract Managers all the time that the information on Subscription Center is not “bank-account” sensitive and if you set up access, you can control what your players can or cannot do. So let’s choose our lineup…
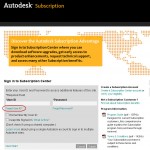
Step 1: Log In (subscription.autodesk.com)
Step 2: Access Your Subscription Benefits
Step 3: Navigate to the Contract Administration Page
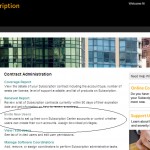
On the left hand side of the screen will be a menu of links. Click Contract Administration.
The Contract Administration page will come up. Click the “Invite New Users” link.
Step 4: Add Users
Under Add a Recipient, enter the e-mail and name of a user, then select Add to Recipient List.
You can continue adding to the list by filling out the user information and clicking Add to Recipient List, or you may type the user information directly into the Recipient List in the specified format. Be sure to click Check for Errors when you’re done.
Scroll down and Check Yes for Full Product Download, if you want users to have the ability to download the software.
Toggle on the Contract(s) you wish your users to have access to. Scroll down to the bottom of the page and select whether you want your users to have access to E-Learning and Product Extensions under the Provide User Access heading. You also have the option to add a personal message with the invitation. This gives you the opportunity to lay down some ground rules of use. For instance, protocols for downloading the software and whom to notify before doing so. You will be given the option to Preview the Invite before sending.
Click the Invite User Button and you will see a pop-up screen indicating that your invitation has been submitted. It usually takes a few minutes to receive. It should come from [email protected]. Check your junk mail folder if it doesn’t come through.
That’s it! You’re Done…


