AutoCAD CUI Custom Commands
It’s time to take a step back from all the Autodesk 2012 releases and look back into the past a little. The AutoCAD Customize User Interface (CUI) was a new feature of AutoCAD 2006. It’s hard to believe that so many releases have occurred since then. Time marched forward though and we’ve come to accept AutoCAD’s incremental changes. In the same way, we’ll probably become accustomed to the new features in AutoCAD 2012 such as that friendly auto-complete that is always sneaking up on us.
In 2009, we got access to the Action Recorder. Before the Action Recorder, the easiest way to create a custom command was to use a macro. What I mean by this is a collection of existing commands and options that can be run with a single click created in the CUI. CAD Managers will still frequently use macros for drafting practices that they want their users to adopt. For example, if you wanted your users Audit their drawings, you might want to have a button that will Audit and then Save the drawing.
Note: Make sure to back-up your CUI files from the default AutoCAD support file search path before modifying them.
Windows XP
- C:\Documents and Settings\%username%\ Application Data\Autodesk\AutoCAD 2012 – English\R18.2\enu\Support
Windows Vista/Windows 7
- C:\Users\%username%\AppData\Roaming\Autodesk\AutoCAD 2012 – English\R18.2\enu\Support
Here’s a walkthrough on creating this custom button using the CUI.
- Open the CUI editor by typing CUI at the command line.
- It is best to make your customizations in a new CUI file. If you make your customizations in one of the standard CUI files such as ACAD.CUI, then it will become more work to migrate your customizations to next year’s release. By default, vanilla AutoCAD comes with a blank CUI file called custom.cui. This is a great place to start making your changes.
- Click the Create a new command button,
.
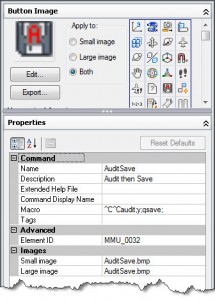
- Fill out the Properties of the button on the right side of the CUI editor. The Macro field is where you enter your commands– just as you would at the command line. A few special characters also apply for macros:
- ^C – Escape key, usually inserted twice at the beginning of a macro
- ; – Enter key
- \ – Pause for user input.
- The AuditSave routine properties would look something like the following.
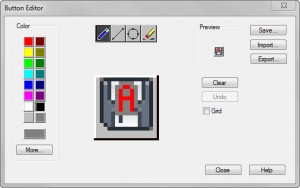
- If you are using the CUI for buttons, it’s best to create a custom icon. Select an existing icon to start with then click Edit. You can then add to the button and save it with a new name. I took the Save button image and added an A so that I could distinguish my AuditSave routine.
- Finally, add the new command to a ribbon panel, menu, or toolbar by dragging it to the appropriate location in your partial cui file.
^C^C_AUDIT;Y;QSAVE;


