AutoCAD for Mac
In November of 1994 R14 appeared on the scene and you could no longer run AutoCAD on an Apple Macintosh. Fast forward 16 years—your babies have grown into high schoolers, you’re Apple Macintosh is now just a Mac, and Autodesk has just released AutoCAD for Mac!
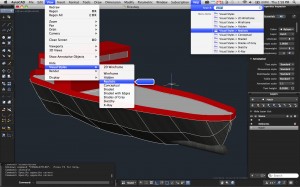
The public release date is today, though we got our hands on it a little earlier, and I wanted to share a little bit on the new program. It’s not a version of currently existing Windows software that’s been ported to OSX, but rather a brand new product designed from the ground up. I’ve been using Boot Camp to run AutoCAD on my Mac for awhile, but now having the icon natively in my Dock below my picture of the bay bridge seems a little funny.

When you first open AutoCAD for Mac, you’ll see a welcome screen that includes a bunch of videos to help you get accustomed to the new interface. I recommend watching the video on gestures. Using a Magic Mouse or track pad, you’ll be able to do things like zoom with a two finger swipe. Which controls work for you will depend on your setup. On my MacBook Pro, these are the default gestures:
- Two fingers – Zoom
- Space bar with one finger – Pan
- Shift with two fingers – Orbit.
Of course you’ve also got buttons in the status bar for zoom and pan.
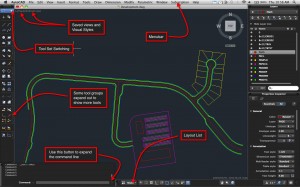
Just like Windows’ AutoCAD, you’ll see the following main areas:
There are a few minor interface changes:
- There’s a layout list in the status bar which allows access to and the creation of layouts.
- Cursor coordinates are displayed in the bottom right corner of the drawing area.
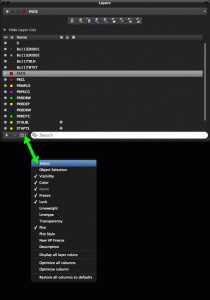
- Palettes can be turned on and off or minimized as icons through the Windows menu.
The biggest difference is how drafting tools are accessed. On the left side of the screen you’ll see the Tool Sets Palette, which resembles the old AutoCAD toolbars. It replaces the Ribbon as the graphical interface for running commands. Tools are also accessible through the menus at the top of the screen, referred to as the Menubar.
Not only does the Tool Sets Palette replace the Ribbon, but Tool Sets also replace workspaces. At the top of the Tool Sets Palette there is a switching menu for the selection of different Tool Sets. Each set contains a collection of tools organized within tool groups. Though Tool Sets typically contain only a subset of the available commands, everything is always accessible through the command line. Unlike workspaces, switching Tool Sets will not affect the Menubar. Though customizable, there is only one Menubar which will display at all times.
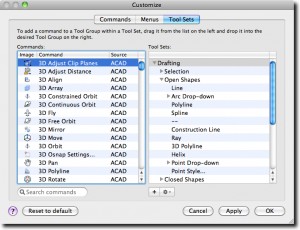
Though the extent of customization in AutoCAD for Mac may be diminished, both Tool Sets and the Menubar can be controlled through the CUI interface, accessible though the CUI command or Tools à Customize à Interface through the menus. In the resulting Customize window, Tool Sets and Menus can be created and edited to contain different tools.
Finally, another valuable tool is the search function of the help feature. By searching for a command and choosing a menu item in the resulting list, you’ll see a bouncing blue arrow showing you how to access that specific tool. Kind of a neat little feature.
